Insert an Image
THESE PAGES ARE STILL UNDER CONSTRUCTION AND DO NOT NECESSARELY REFLECT THE CURRENT VERSION OF TÓPICO
In this tutorial, you'll learn how to add an image to your topic.
Before adding images to your topics, it is strongly suggested that you format these images to best fit your published web pages. You should also copy all images are in the online/images folder (see Site Folders Structure) unless you want to type longer file paths.
Insert an image with the editor toolbar
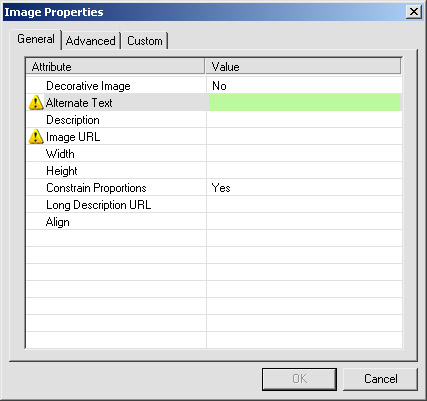
To add an image to your topic:
- Position the cursor at the location you want to insert the image;
- Click on the image button
 in the toolbar;
 - Enter some Alternate Text for the image (a very short description);
- Type the image relative URL, preceded by the folder name (ex.: images/myimage.jpg);
- Click .
Floating images left or right
If you want the image to float either on the left or right side:
- Select the image you want to float;
- Right click on it;
- From the pop up menu, select or
Although resetting the dimensions brings no visual change, the XStandard editor writes the image dimensions so web browsers can better prepare their layout engine when loading the page. This prevents the page layout to reshape itselfs drastically, which is annoying.
A later revision of Tópico will probably write these values when inserting the image.
THESE PAGES ARE STILL UNDER CONSTRUCTION AND DO NOT NECESSARELY REFLECT THE CURRENT VERSION OF TÓPICO